Some more progress on this. I’ve been running tests and with a stripped down overclocked Pi Zero 2W the generation time for an average length sentence is around 2-4 seconds… which is certainly not ideal, I’m considering maybe reworking the project to support a full sized Pi 4/5. Unfortunately that will definitely lead to more battery usage and obviously more bulk…
As it stands now:
With fairly regular talking, the single swappable 18650 cell lasts around 5hrs
Setences take roughly 2s to 5s to generate
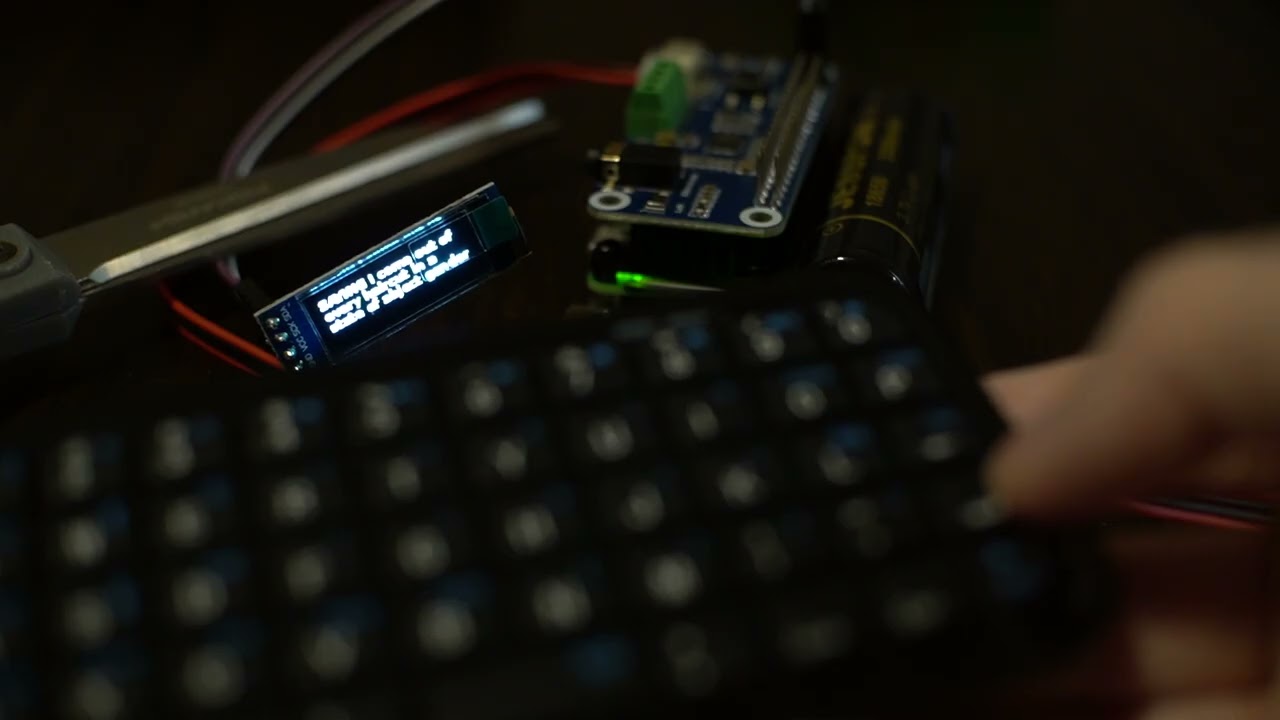
One speaker is plenty loud enough, so removing the other (this is at like 10% volume in the video)
Which meets my battery life / speed / volume requirements to make this at least usable.
Unsure for now though since I got the generation time at least… acceptable I’m going to start improving the overall UX. Adding a case, adding an options screen and so on. Also v1.1 should have improvements where it caches simple phrases and tries to guess ahead, I think that would greatly improve the experience. This project has already been very fun.
Below is a test video of it working in real time:
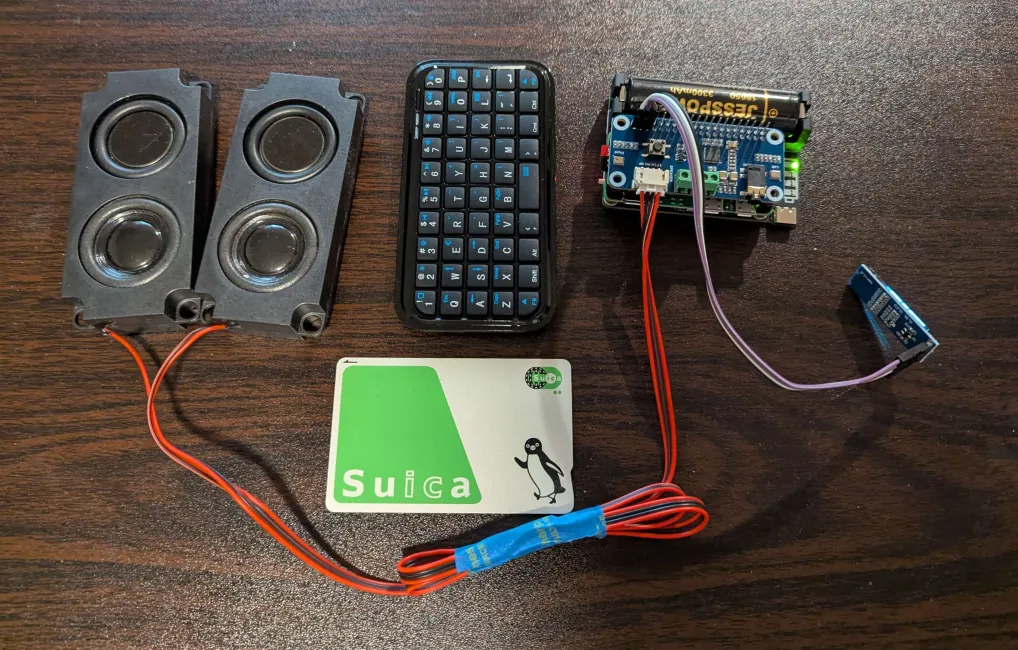
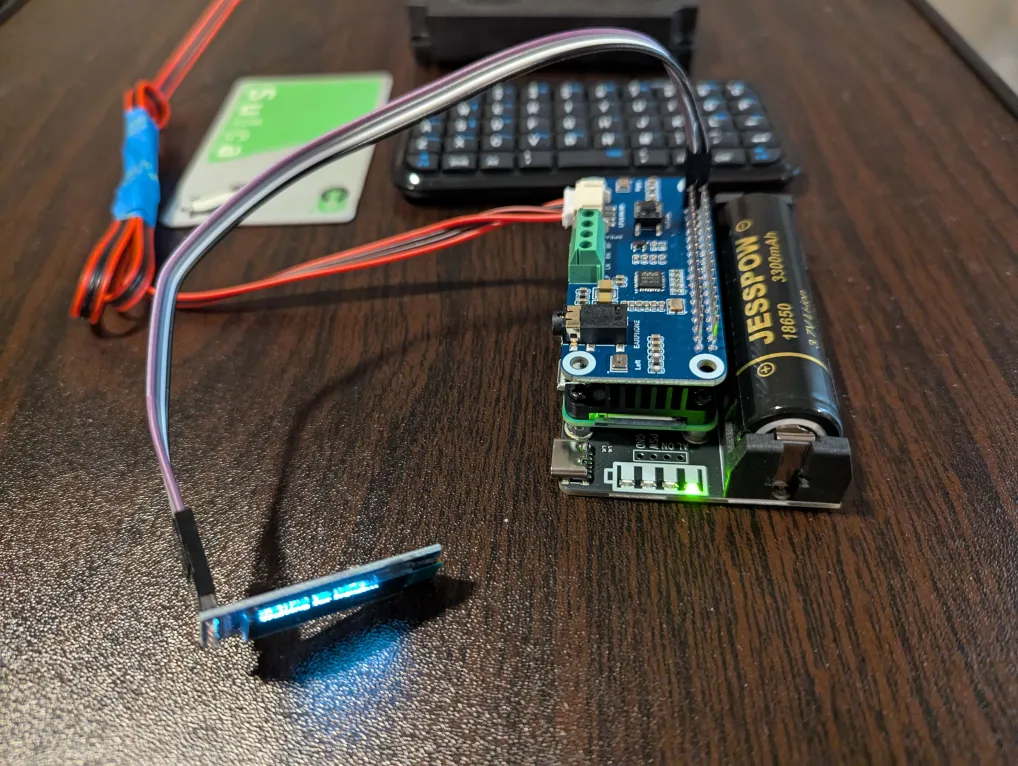
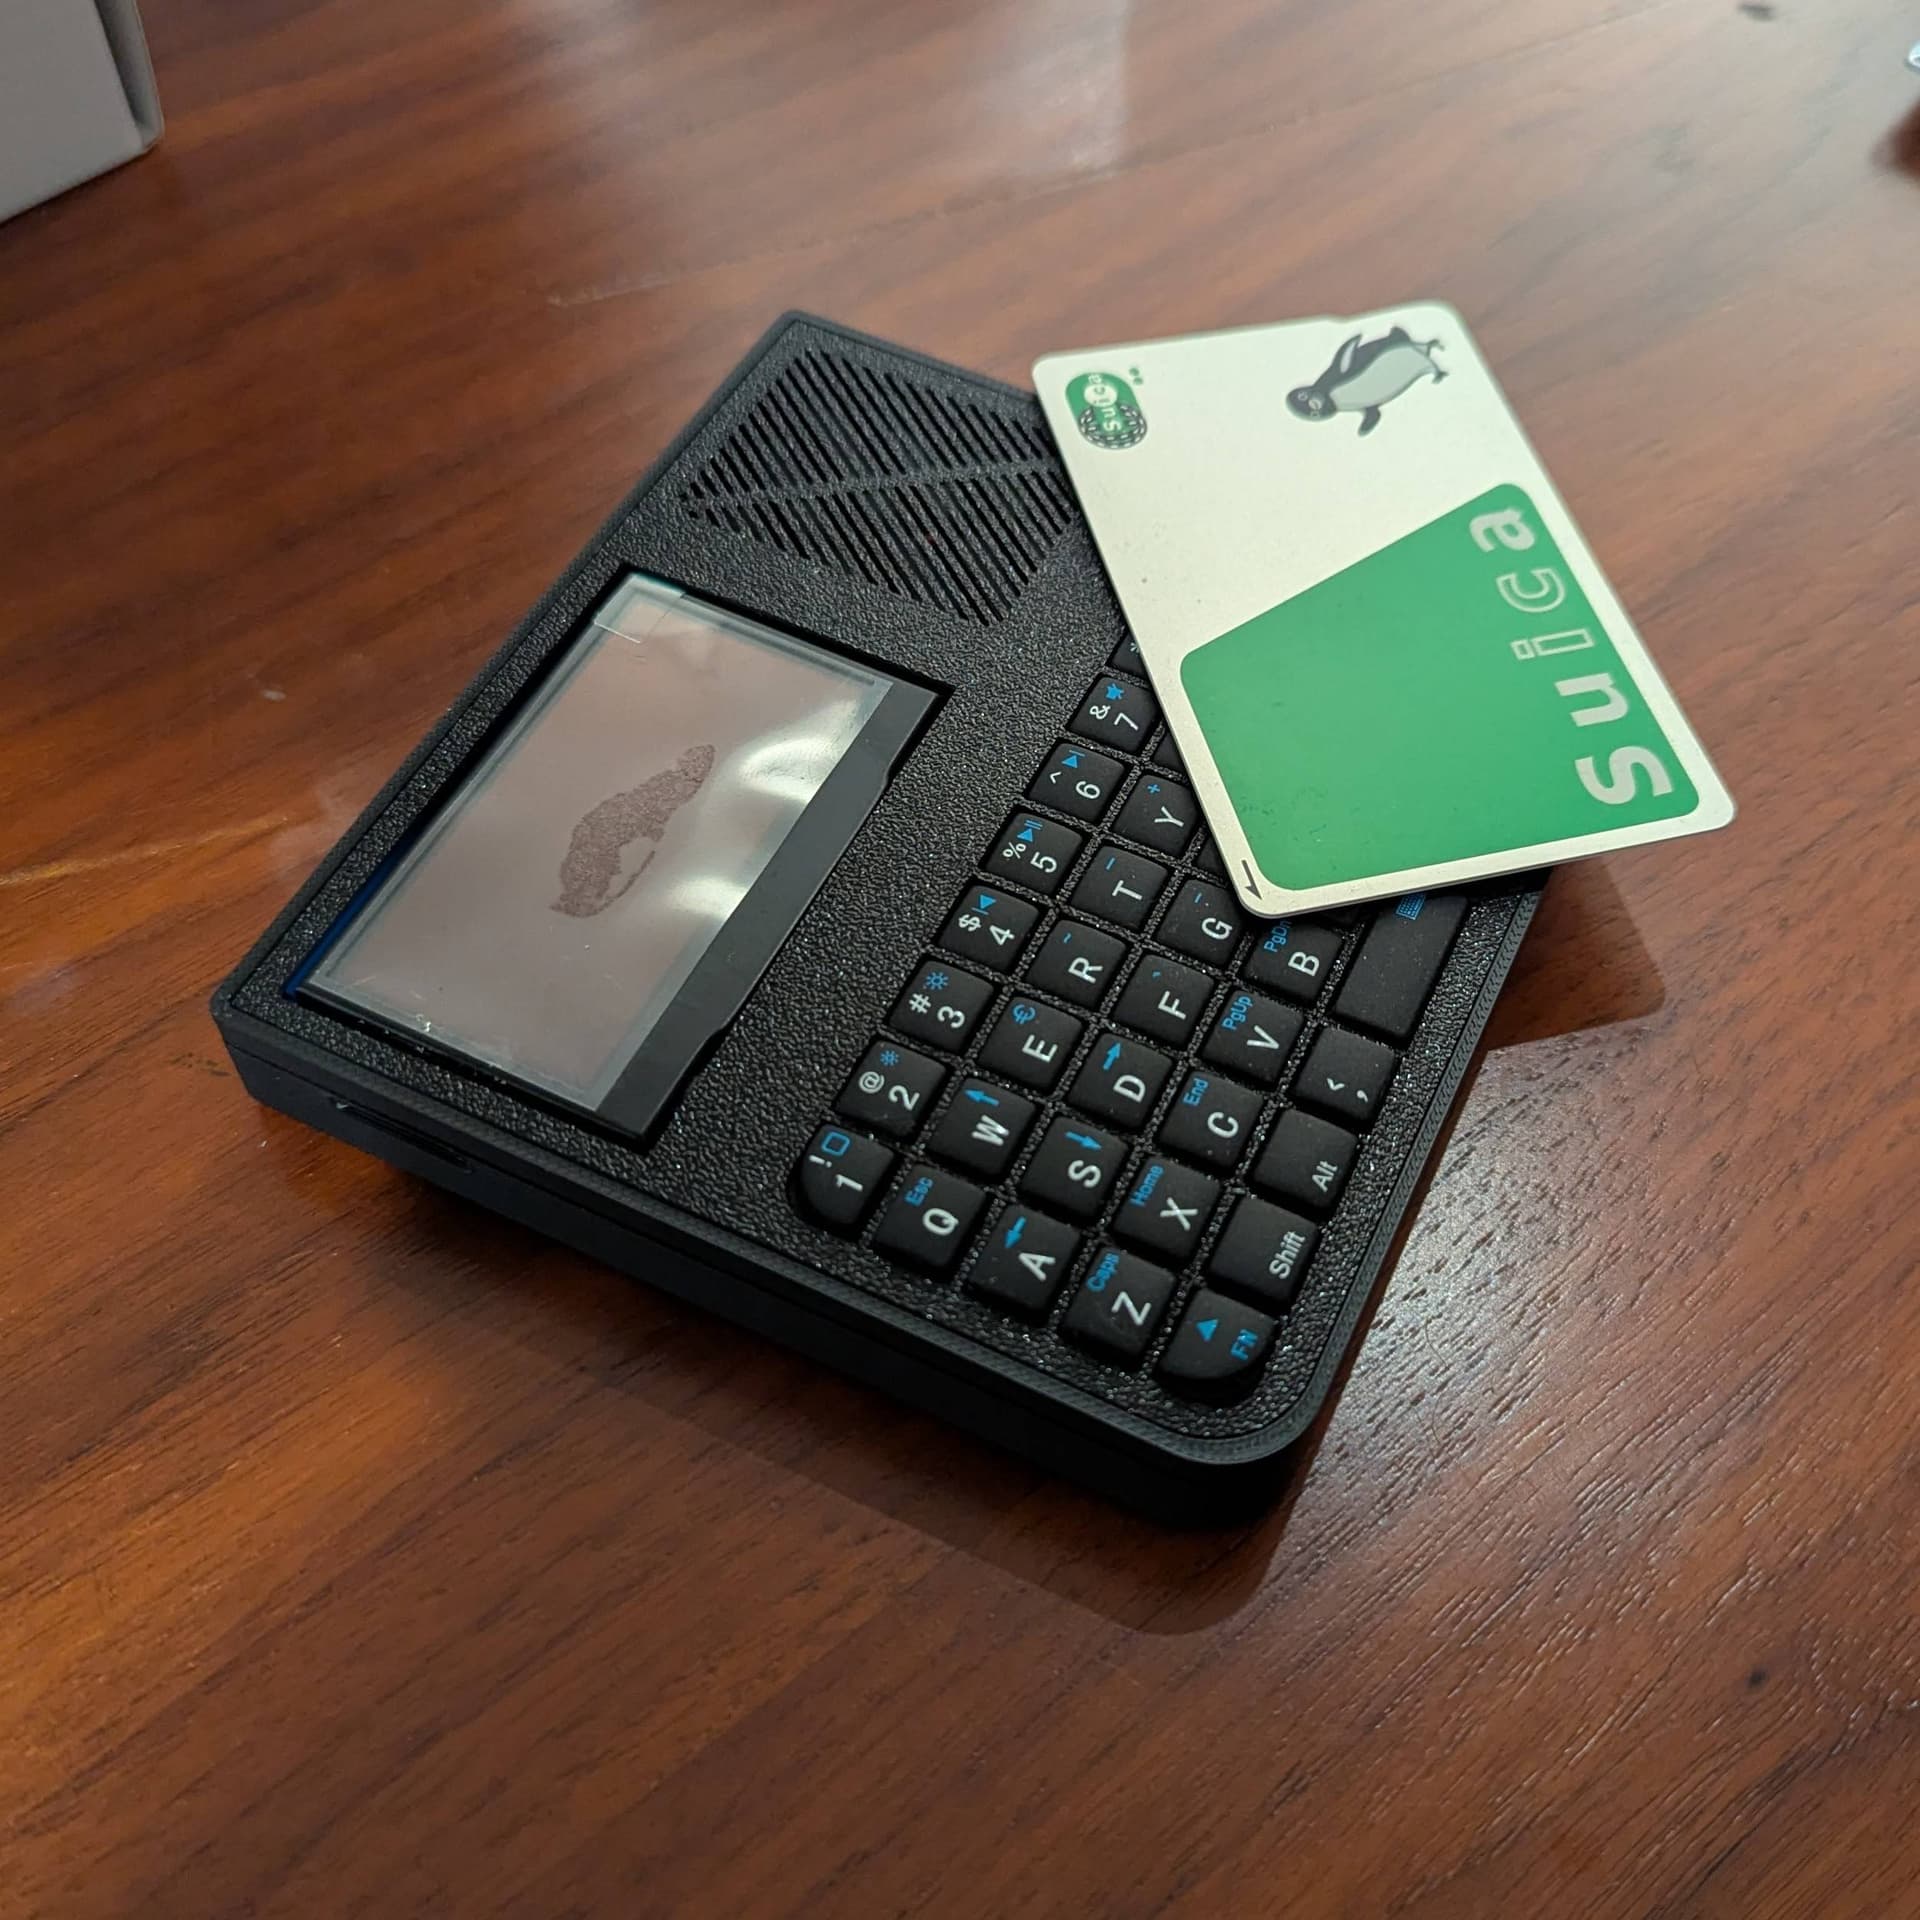
Below are some images with a suica card for scale (basically a credit card)
Better display handling: twice the fps and a new frame buffer to ensure proper updates without frame corruption
Better handling of non-alphanumeric characters
Custom pronunciation overwrites (useful for names)
Proper handling of keyboard disconnects
Better text wrapping
Hot swapping voices
Timeout error handling: ensures no hanging as it’s able to restart itself in the event of an error automatically
Icon system to show current task: used to show generation/speaking/keyboard search for now
Speaker volume control
This was all the stuff I deemed necessary to actually finally build it into a proper little device, I fried the screen cause I’m stupid, need to wait for the new one to arrive before I can. I’ll update yall when that happens~
I’m a total claud and managed to nuke a pi, screen, DAC, and charging circuit during this project. Unfortunately, this means I am once again in a holding pattern while I wait for more parts to arrive… whoops! I did manage to remove about 10 mm from the thickness of the device with the part swap, though, so I think it may have been a painful blessing in disguise.
The new total part cost (minus the 3D printed case) is now closer to around 80 USD. This could be reduced, though, if you forgo the onboard audio out and cheap out on a few other components, so I may attempt to make a 50 or less dollar version once this one is completed.
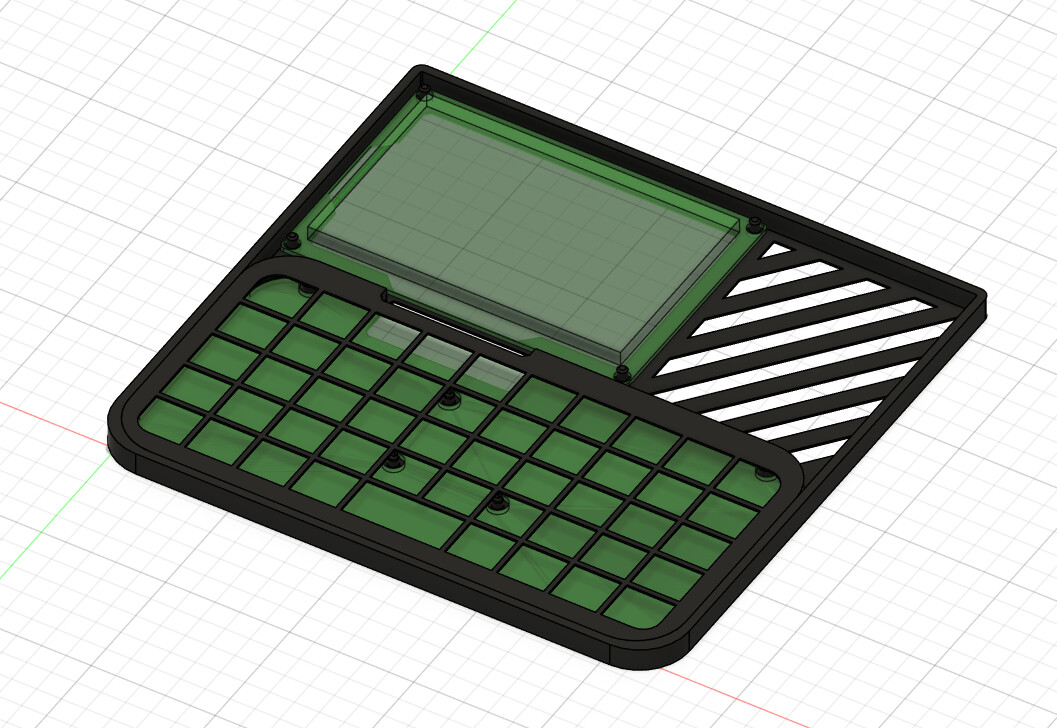
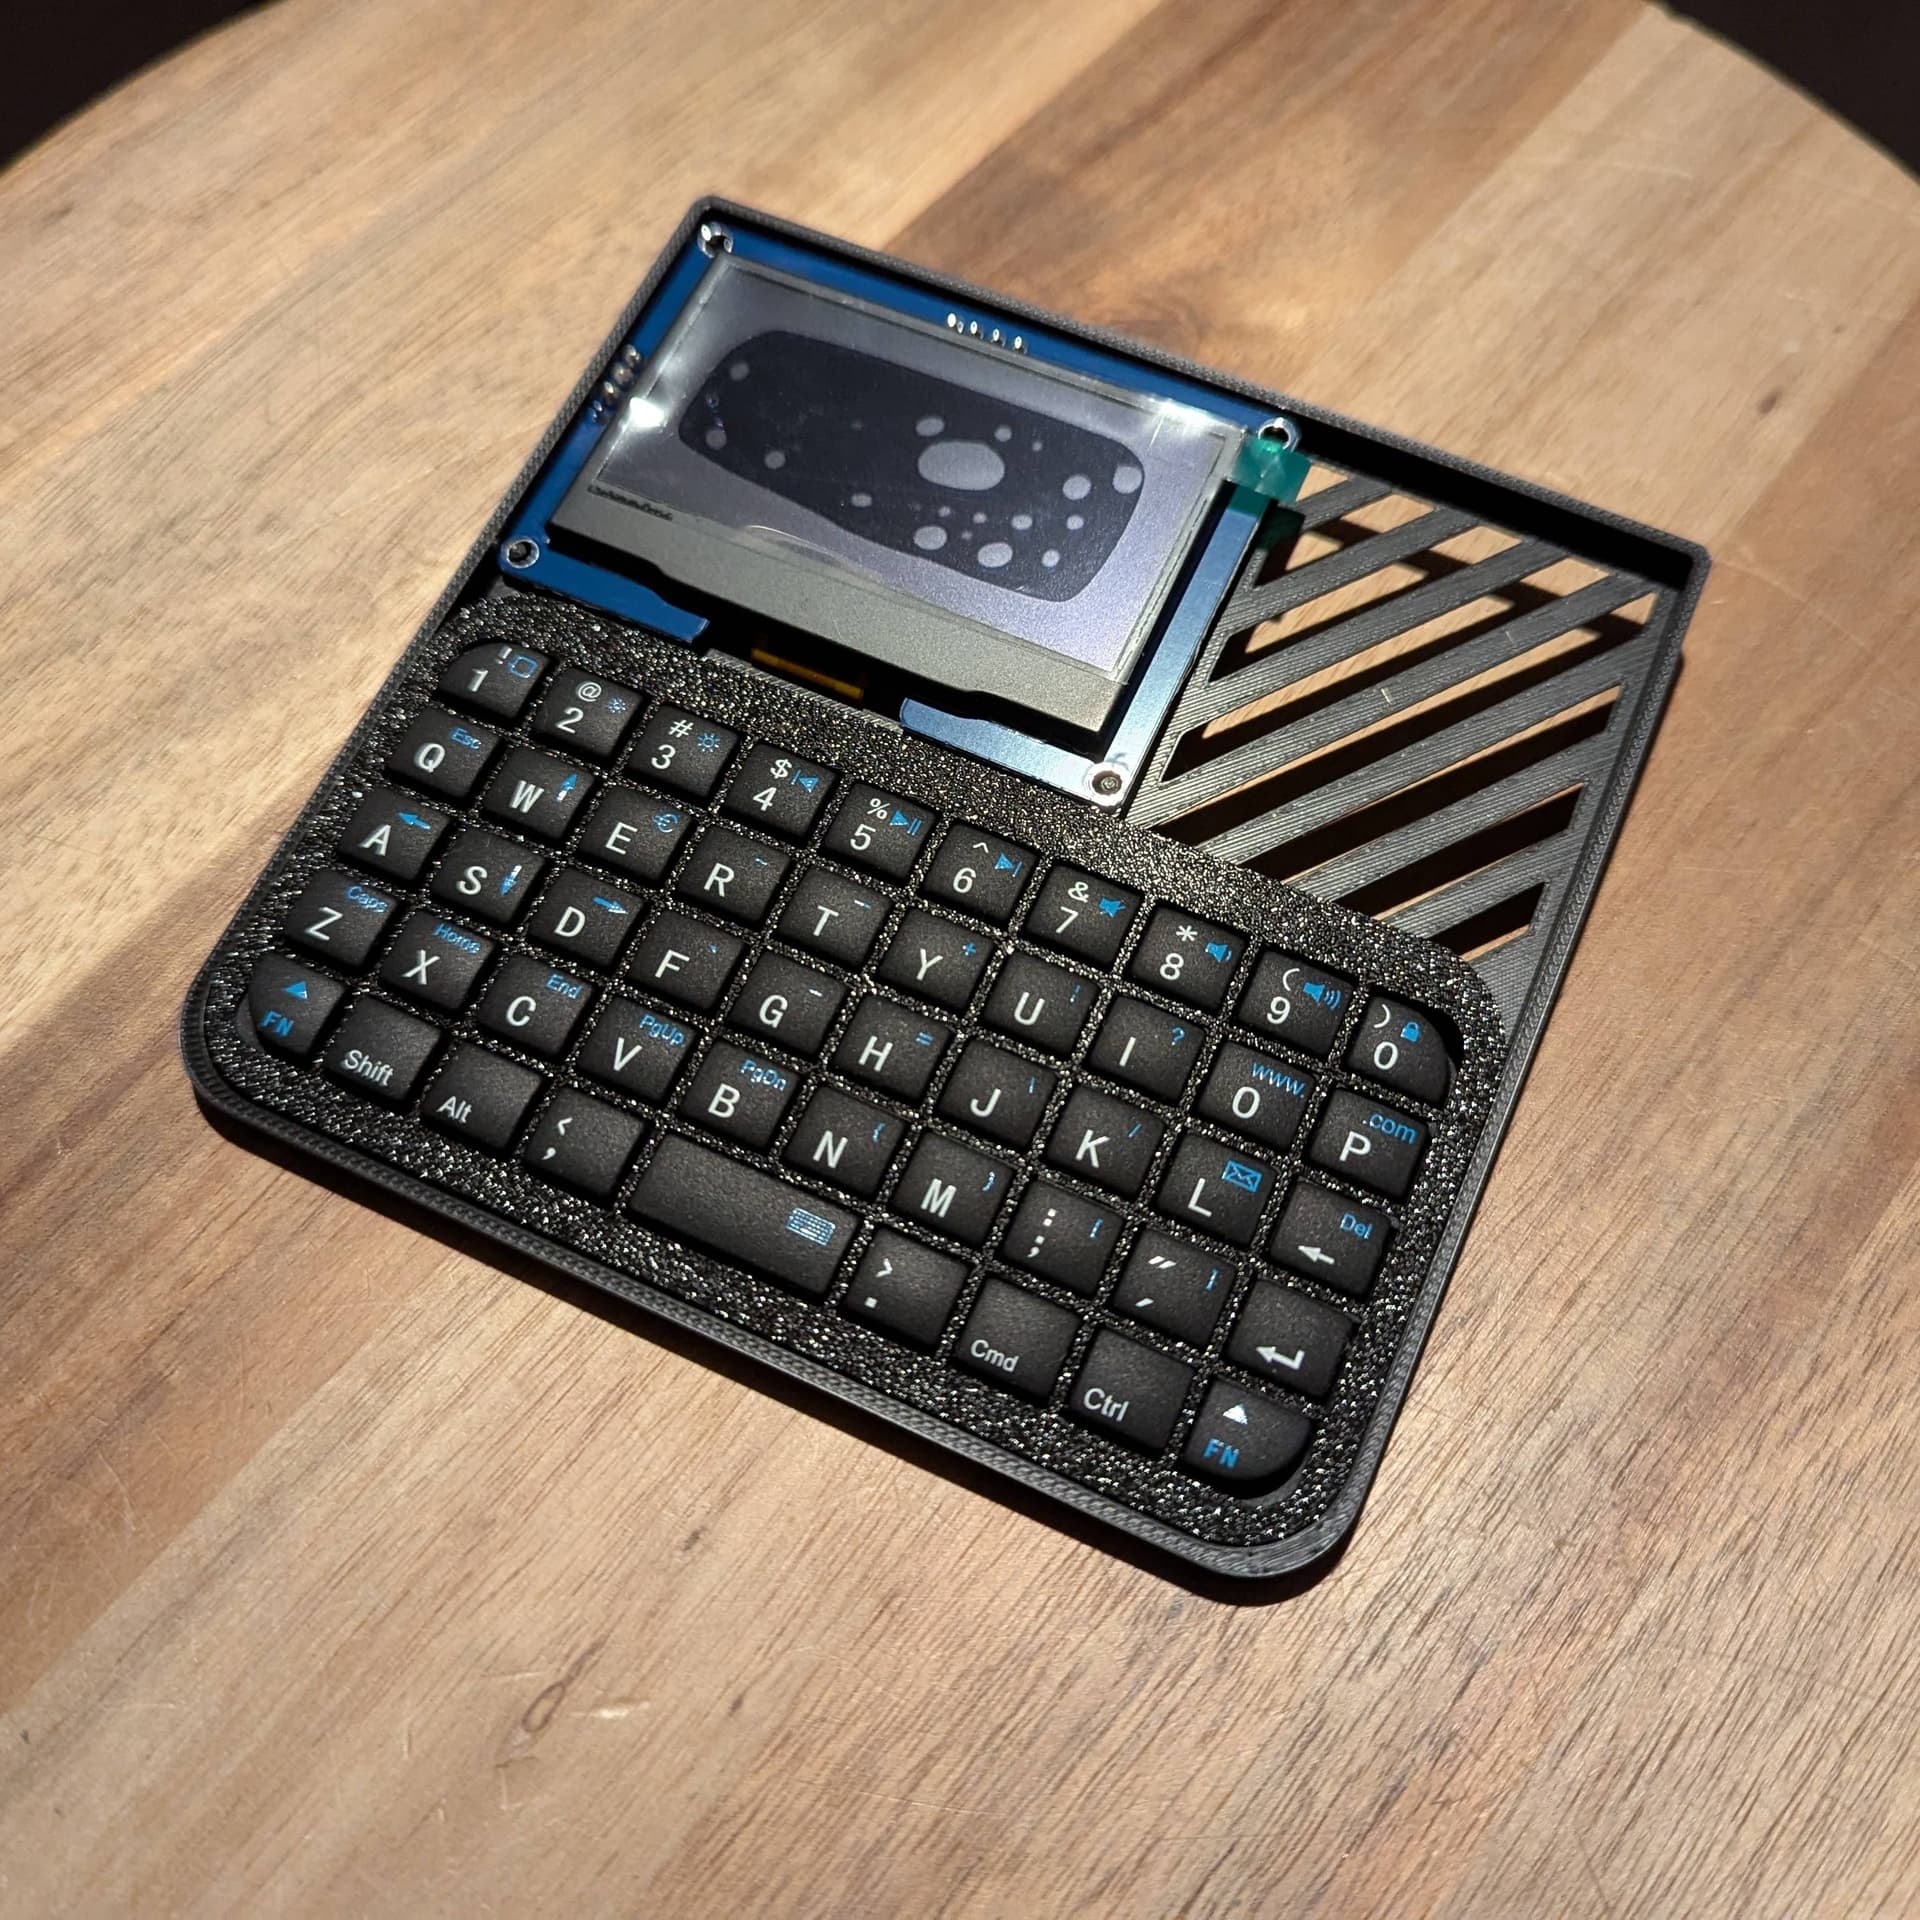
Case V1 Completed
I’m really loving the look it has, and the typing feel is better than expected! Still need to tighten up a few tolerances and wait for the parts to come in but this project seems to! In true Pidge fashion, I’ve decided to add a few more apps to the device while I wait for the new parts to arrive (hopefully next week). So it now has a WIP notes app and a simple game
some folks were confused by the suica it’s there in place of an actual credit card but they’re basically the same size lol
Footnote
Also, I’m experimenting with surface transducers to see if I can make the device louder when set on a table. If any of y’all know a smallish part I could use for that, please do respond with a link!
Since I’m waiting on the final few parts to come in tomorrow, I figured I’d spend a bit of time making a proper little menu for the device. This is a mockup of the main app launcher where you can launch apps, adjust settings, see the info for the whole thing, etc.
Hope to have a new update for yall by this weekend with a finalized MVP. Once that’s done, the plan is to release the code then eventually the CAD / electronic setups.
Hope yall like the new menu setup preview
Still considering more names BTW so feel free to pitch another one! The current placeholder name is ProxiTalk, but a few others have been suggested like VoiceBox. Even better if you have an icon in mind~
Send commands to the display using self.display_queue.put():
# Simple text screen
self.display_queue.put(("set_screen", "Title", "Message text"))

# Clear the display
self.display_queue.put(("clear_base",))

# Draw a PIL image at position (x, y)
self.display_queue.put(("draw_base_image", img, x, y))

# Draw text directly
self.display_queue.put(("draw_text", x, y, "text", font, fill))
Audio and TTS
# Play sound effects (place audio files in your app directory)
self.play_sfx(self.path + "sound.wav")

# Text-to-speech
# The background=True option allows TTS to run without drawing to the screen
self.run_tts("Hello, this will be spoken!", background=True)
App Metadata
Create apps/your_app_name/metadata.json:
{
  "name": "My Custom App",
  "version": "1.0",
  "description": "A description of what your app does",
  "author": "Your Name",
  "type": "app"
}
For overlay apps (run in background):
{
  "name": "My Overlay",
  "version": "1.0",
  "description": "A description of what your overlay does",
  "author": "Your Name",
  "type": "overlay"
}
While I put the final touches on the build log itself I realized some of yall may want to start ordering / sourcing parts so they can ship why you wait till this weekend. Below should be all the parts I bought for the project excluding the tools / random bits of wire I used and the 3D printed case.
Shopping List
These are the components required to make this build. All links are where I personally obtained them, but I have no affiliation with any of these sites. If you find the parts somewhere else, you can use them. However, please keep in mind that I cannot promise the setup/build instructions will remain exactly the same. If you have any questions about case mods or other modifications to the build, please don’t hesitate to ask.
Required
Raspberry Pi Zero 2 W (Without Headers)
The brains of the whole operation. Please ensure you obtain one without headers; this will make the setup process much easier.
Lithium Ion Polymer Battery - 3.7v 2500mAh
Used as the base power source for the entire device, you can use a slightly larger or smaller one if you wish; however, please note that the case was designed specifically for this exact model.
Adafruit PowerBoost 1000C
This is used in conjunction with the LiPo to charge/manage the battery, as well as the Pi’s power, required for a complete portable experience.
SPDT Slide Switch
A small, simple power switch used to turn the device (Powerboost 1000c specifically) on and off.
HiLetgo 2.42" SSD1309 128 by 64 Oled Display (I2C Version)
Please make sure you select the I2C version instead of the SPI for ease of setup. Any color is good, so pick your favorite!
Random Wireless Bluetooth Keyboard
Picked due to its small size and fragile-looking shell (you have to crack it open to get to the nice insides that we actually want lol).
Raspberry Pi Zero 2W Heatsink
Unfortunately, while the Pi does run mostly cool, I did end up needing a heatsink over long usage periods. This is the exact one I picked up!
Optional
Adafruit I2S 3W Stereo Speaker Bonnet
This is used to have decent audio output for the device’s speakers, as GPIO direct output was deemed too rough. If you don’t want onboard speakers, this isn’t required, but know that will mean you’ll have to connect a Bluetooth speaker whenever you want to use it.
Uxcell 4 Ohm 3W Speakers
These are the exact speakers I ended up going with; they have a good size-to-power ratio and sound quite good, despite their limitations.
Raspberry PI GPIO Female Headers
I used this to make it easier to prototype and take apart. Technically, you could solder directly to the Pi, though!
USB C Breakout Board
Again, used for convenience and ease of use. I wanted USB-C on this device instead of the Micro USB that the 1000C PowerBoost comes with. Feel free to find a PowerBoost clone that has USB-C or simply live with the Micro USB; your choice.
Misc Supplies
Solder
Wires
Heat Shrink
Hot Glue Stick
Any 32+ GB Micro SD Card (for the DietPi install and ProxiTalk OS)
Misc Tools
Soldering Iron
Automatic Wire Stripper (Optional, but it’s nice to have)
Hot Glue Gun
Screwdriver
Wire Cutters
Needle Nose Pliers
Full Costs
Everything from the places I bought them: $127.56
Unfortunately, this cost ended up being a bit higher than expected. A future version made with a custom board would likely reduce the price significantly at scale. However, given that we have to buy so many discrete components, I couldn’t see it getting much lower overall with this setup. If money is tight, consider cutting out the onboard audio and other optional features, and you can get it to be just under $100.


 Launcher
 Info
Info ProxiTalk
 Clock
Clock Hebi
Hebi Tetra
Tetra Settings